- Messages
- 15,090
- Reaction score
- 36
- Trophy Points
- 133
With this tutorial you will learn how to create advanced scrolling credits. These credits can include graphics, different colors, or whatever you want. This techniques uses Adobe Photoshop, and Sony Vegas. However, any graphics editor can be used in place of Photoshop, and the techniques used here for Sony Vegas are probably similar for other video editing software such as Ulead.
1) create an image that is 720 pixels wide by however long you need it to make the credits. Save this image as a .png for clarity. See my example below. Spacing in between objects is up to you. I have put a minimum of 480 pixels vertically in between a lot of the groups of credits, so that one group completely leaves the frame before the next appears. See the video I have attached as an example (coming soon).
Image example for credits
2) add this image to your video timeline in Sony Vegas. Drag it to approximately how long you think your credits will roll. We will adjust this later. Mine was set to approximately 2:37 seconds. This was a nice speed for the amount of credits I had. On the right side of your video clip (the image) in the timeline, you will see a small pan/crop button. Click that and a window will open.
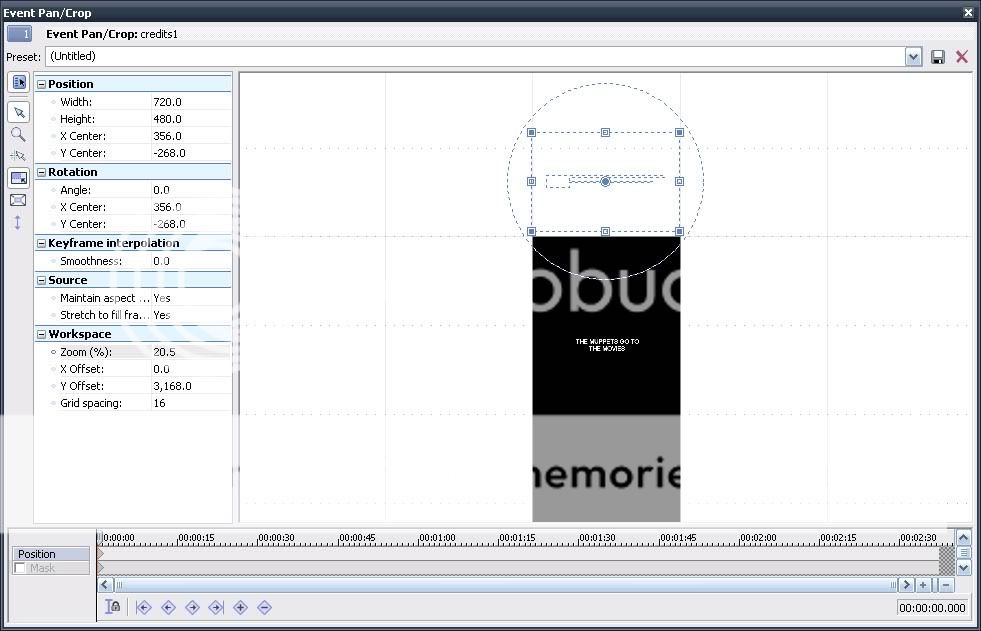
3) Set your dimensions to width: 720, height: 480. On the very left side of the window you will see some icons. There will be one to lock the direction of movement. Make sure that you allow movement only up-down. You will see a dotted-line box with an F in the middle of it and a circle around it. Move this box to above your image as illustrated in the image below.
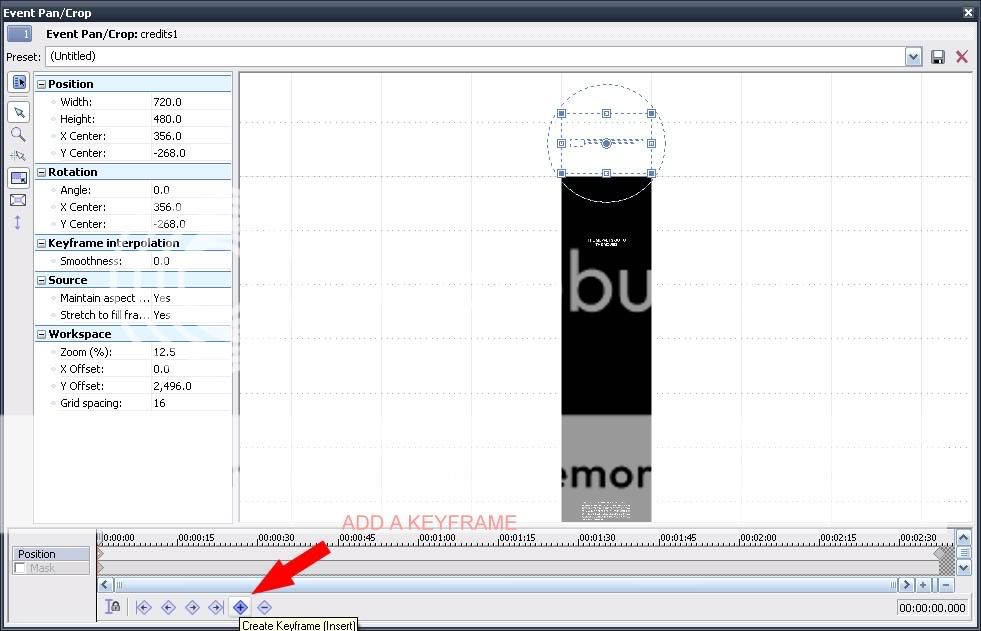
4) Add a keyframe by clicking on the button at the bottom of the window with a + sign in it. See image below
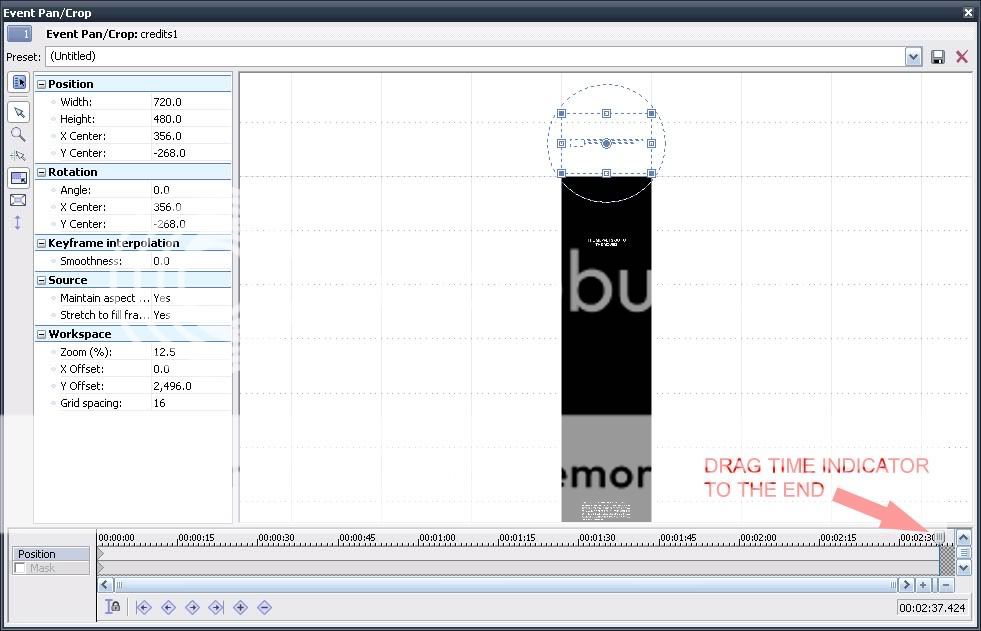
5) Drag the time indicator on the timeline all the way to the right (the end of your clip). See image below.
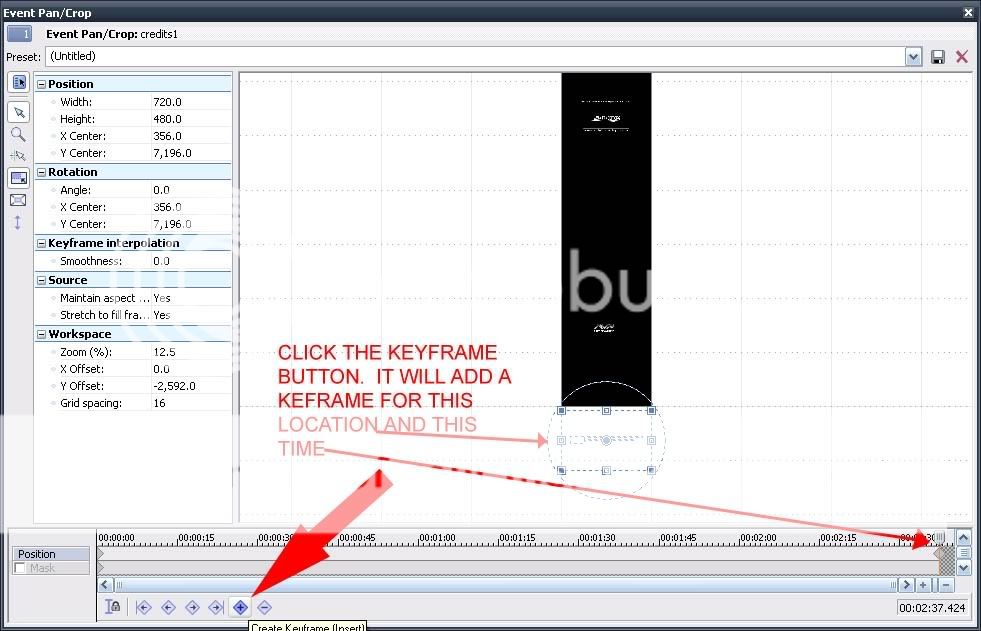
6) Move the ?F? box to below your image. See image below.

7) Click the keyframe button again to add a keyframe for this time and location. See image below.
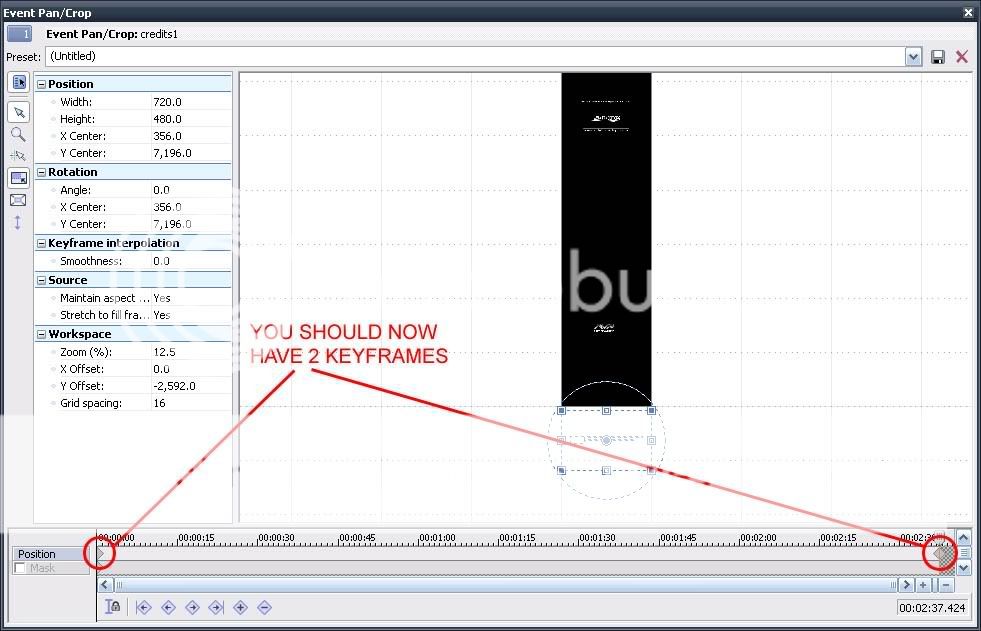
8) Just to double check before we leave this window. You should have 2 keyframes. See image below.
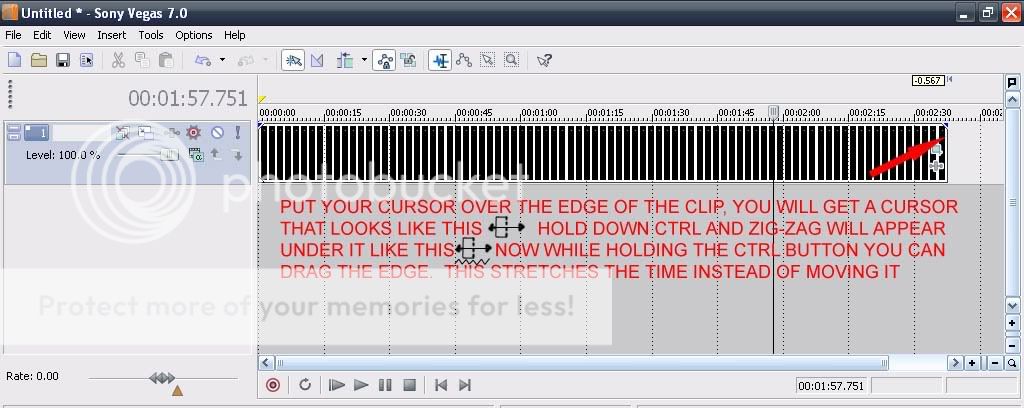
9) You can now close this window and return to your main editing window. Test the speed of the scrolling by previewing the clip. You can add any music or sound effects you want in an audio track. To change the speed of the clip we can easily just stretch the time. See image below.
1) create an image that is 720 pixels wide by however long you need it to make the credits. Save this image as a .png for clarity. See my example below. Spacing in between objects is up to you. I have put a minimum of 480 pixels vertically in between a lot of the groups of credits, so that one group completely leaves the frame before the next appears. See the video I have attached as an example (coming soon).
Image example for credits
2) add this image to your video timeline in Sony Vegas. Drag it to approximately how long you think your credits will roll. We will adjust this later. Mine was set to approximately 2:37 seconds. This was a nice speed for the amount of credits I had. On the right side of your video clip (the image) in the timeline, you will see a small pan/crop button. Click that and a window will open.
3) Set your dimensions to width: 720, height: 480. On the very left side of the window you will see some icons. There will be one to lock the direction of movement. Make sure that you allow movement only up-down. You will see a dotted-line box with an F in the middle of it and a circle around it. Move this box to above your image as illustrated in the image below.
4) Add a keyframe by clicking on the button at the bottom of the window with a + sign in it. See image below
5) Drag the time indicator on the timeline all the way to the right (the end of your clip). See image below.
6) Move the ?F? box to below your image. See image below.
7) Click the keyframe button again to add a keyframe for this time and location. See image below.
8) Just to double check before we leave this window. You should have 2 keyframes. See image below.
9) You can now close this window and return to your main editing window. Test the speed of the scrolling by previewing the clip. You can add any music or sound effects you want in an audio track. To change the speed of the clip we can easily just stretch the time. See image below.