• Most new users don't bother reading our rules. Here's the one that is ignored almost immediately upon signup: DO NOT ASK FOR FANEDIT LINKS PUBLICLY. First, read the FAQ. Seriously. What you want is there. You can also send a message to the editor. If that doesn't work THEN post in the Trade & Request forum. Anywhere else and it will be deleted and an infraction will be issued.
  • If this is your first time here please read our FAQ and Rules pages. They have some useful information that will get us all off on the right foot, especially our Own the Source rule. If you do not understand any of these rules send a private message to one of our staff for further details.
  • Please read our Rules & Guidelines

    Read BEFORE posting Trades & Request

Here is a small tutorial on how to make accurate film grain with a film grain layer

DonkeyKonga

Well-known member
Faneditor
Messages
1,237
Reaction score
1,189
Trophy Points
133
For those that want to add film grain to The Hobbit, or Star Wars prequels or any ugly digital movie.

What you need is to download a film grain fragment (for example for free here:
https://pixeltoolspost.com/pages/free-film-grain )

Set this as a layer on top of your movie and set it to 'vivid light'. Copy paste it untill it covers your entire project. Set a matte track on the Grain layer to Luma.

Make a duplicate later of the movie and put this ON TOP of the film grain layer. Adjust these settings on the duplicate layer: Make it black and white -> invert it -> raise exposure to 3.0 -> Lower peak brightness to 80 -> Raise shadows to 50 and whites to -80.

Put the movie layer on the bottom, the overlay in the middle and the duplicate on top.
Changing the values of the duplicate layer will change the manner in which the film grain affects light areas of the movie, feel free to experiment but keep in mind: Real film doesnt affect very bright light areas.
Want more grain? Duplicate the grain layer and set the correct track matte layer!

Note: The bitrate for this 4k fragment is crazy high. 340 MBPs. But its needed for that crisp result.
 
Last edited:
Yes. This one is 4k perfection and you get 4 different grains! All you need to do it sign up download and then sign out of the newsletter.

 
For the half hour loop, did you blend from one to the next or did it work as just hard cuts from the end to the beginning over and over?
 
From my experience it works fine without any additional blending.

I've usually just put the grain overlay on top, do some adjustments on it, and it usually ends up looking fine:

Before: https://images4.imagebam.com/89/a1/5c/MEFYHRN_o.png
After: https://images4.imagebam.com/b2/11/8e/MEFYHRK_o.png

What are the advantages of that procedure with duplicate?

Real film grain has more grain in dark areas, less grain the lighter it becomes and no grain in very light areas like the sun or bright highlights. It has to do with crystallization and science you can look it up. Since your layer has the same amount of grain everywhere, it's not an accurate depiction if how film looks. Your grain looks better that digital, but it can look even better.

It's just a matter of how accurate you want your digital film to represent actual film.
 
Since your layer has the same amount of grain everywhere, it's not an accurate depiction if how film looks.
Well, it seems I dont mind it may be not that accurate.
That being said, I will give it a shot to see how different/better will be the end result with your method.

BTW, what software are you using?

Your grain looks better that digital
In fact, it is digital fake grain created with some Vegas filters :)
 
Well, it seems I dont mind it may be not that accurate.

That being said, I will give it a shot to see how different/better will be the end result with your method.
BTW, what software are you using?


In fact, it is digital fake grain :)
Oh i meant it looks better than digital without grain. I will try to show a screenshot with the difference in approach.
 
Ah, ok, I sometime use some scans of real film as overlays too (mostly for grindhouse-damaged effects).
 
If you open that image you can see that the sun on the top image has no grain, and the skies have more grain the darker they become. Its a far more dynamic looking image, but in reality it's a still from the Hobbit which has no grain by default, which is on the bottom image.
 
Last edited:
Frankly, if wasn't told and without comparison to original frame, I probably wouldn't even notice what was done here (as it looks only slightly grainy).
I usually operate on way heavier grain.

EDIT: Ok, now I see something but I still need to compare that method on actual footage. Probably will try it on the project I am working on now.
 
Last edited:
Frankly, if wasn't told and without comparison to original frame, I probably wouldn't even notice what was done here (as it looks only slightly grainy).
I usually operate on way heavier grain.
35 mm should only look slightly grainy. But the same applies for heavier grain. It should be less heavy the brighter an image is. If it doesn't bother you then by all means ignore my post. This post is for people who want the most accurate 'real' film depiction possible.

Also, keep in mind film grain is constantly moving, so a still image isn't the best representation. It's only to show how the sun isnt grainy at all with the settings I used, which is a scientifically accurate depicting of actual film.

I use premiere pro, but I would assume any program has these basic options.
 
Why should I ignore useful information? :)
after.jpg

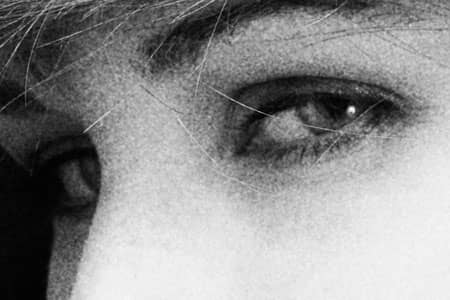
So I found a heavy grain photo that perfectly illustrates how even heavy grain works different with lighter areas. This is the very close to the result you will get when you use 'my' technique. :)
 
The only drawback is - the more layers, the longer Vegas (which I use) renders it.
 
Back
Top Bottom